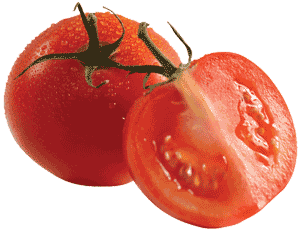
 Frankly, welcome to this ”Frankly Speaking” special online tutorial edition about saving “wet seeds”. Tomatoes are the perfect example of a wet seed, and the techniques explained today work great for other wet seed veggies like: tomatillos, cucumbers, pumpkins, squash (especially ‘big seed’ winter squash), all melons and most chili peppers. (Yes, this works for “cling” citrus fruit seeds too: peaches, oranges, lemons, etc)
Wet Tomatoes
Wet seed saving is actually pretty easy, there’s just a few extra steps involved. You’ve all noticed that little “jelly” packet that surrounds all tomato seeds, this is the stuff we have to remove in order to dry the seeds locked inside. Yes, it’s a bit messy, but also kind of fun, plus you are going to have leftovers… the tomatoes, so plan on making something with them too. Ok, first things first: clean your kitchen, table tops, sink and all your utensils ahead of time.
| TOOLS USED FOR WET SEED SAVING |
|
How to Unlock the Seeds
Since bad bacteria thrive on moisture, we need to remove that moisture filled gel. Allowing moisture to exist on seeds can cause them to rot, it invites bacteria, bad mold and even diseases that can carry over to the plants when they grow.
The Fermentation Way
This method is one of the very oldest ways to remove the pulp and gel that’s on our seeds, so I’ll go old school and teach you how. Remove all your tomato seeds from your (freshly washed under cold running water) tomatoes: The easiest is to simply cut them in half ‘around the equator’. Then stick your finger up inside and coax them out into a deep bowl, big soup pot or bucket.
1. Just Add Water
In your bucket (bowl, etc) gently squish and swish the seed pulp through your hands. Your goal is to make “mush” and yes, get as messy as possible. Don’t pour off or re-rinse, just leave everything in the bowl. Now add a cup of water or so. Swish around and…
2. Let it Stand
Cover your bucket (bowl, etc) and let it stand at room temperature (65°-70°) for at least 3 days. The fermentation process will begin, and you will see a funky layer of goo and mold on top – no worries, this is “good” fermentation mold – and this is supposed to happen.
3. Skim & Rinse
Ok, skim any mold off and throw away. Using a sprayer or a spray aerator head on your faucet, rinse the pulp and seeds several times. As the water rises, so will the pulp and fibers. Swish and squish the seeds around with your fingers. Keep rinsing at full blast. Pour off the pulp as it rises, it’s ok if you lose a few seeds. Keep rinsing until the water is clear.
4. Which are the Good Seeds?
By now you’ve noticed all the seeds have sunk to the bottom, this is good. “Floaters”, clean seeds that come to the surface are not viable, they are dead. Throw them into your compost pile with the pulp and water. The “good seeds” are at the bottom, take a quick swish to see if you have any excess gel – don’t worry if they are not 100% ‘doctor’s office’ squeaky clean. Rinse out any sediment, pulp, etc that has settled in the bottom.
5. Drain, Strain & Dry
Simply pour off the water. Use a fine mesh strainer, if you use a colander, make sure the drain holes are smaller than the seeds! For drying, I use a screen door insert (found anywhere they sell screen doors), make sure the screen is a washable nylon type, not metal that can rust. Spread the seeds out as thin as possible, not touching is best
Let them air dry (not in direct sunlight, and above 80°) for the next few days. Every so often, move them around so they will dry evenly on all sides. You’ll notice some will be stuck together when they dry, just gently rub the cluster between your fingers and they will separate. Dry these another day to make sure they don’t have any moisture. (remember: moisture causes bacterial growth).
You’re Done
All that is left is to save the seeds properly. (refer to the original Tribune Page 4 “Frankly Speaking ”article, October 11th, 2012 – reprints are available at the Tribune Offices (509) 674-2511)
Untreated, raw paper envelops work best for seeds (also available at the Tribune Office Supply Store). Always label your seeds with as much info as possible: the specific variety of tomato, the date and a little bit about the plant: “great tomato for spaghetti sauce, got them from Susan’s garden, they grew best along her fence with 10 or more hours of direct sunlight all summer.” It’s important to note things like the fence, because it acts as a heat source for the plant soil – making them grow much better than if grown in a cooler soil bed with partial shade, wind, etc.
Glass Jars & Cool Places
Store your paper seed packs in an tight fitting glass jar, or other container. Preferably not anything made of plastic. Seeds store best in very dark locations that stay cool (below 45°) all year. Bottom corners of your pantry, a basement or garage work fine. But my fave spot is in the lower drawer of my fridge. This is how many very famous seed saving companies got started… with a fridge in a barn.
The Best seeds produce the Best Plants
Going back to the original article on Seed Saving, always remember to only save the “best-of-the-best” seeds. So if you picked any funky tomatoes that were mushy, old deformed, stunted and obviously diseased… get rid of them… why would you want to grow more of them.
Direct Sunlight
Gardeners ask all the time why I always say to not dry veggies and seeds in the sun. “But it seems so natural…” Well, your seeds & veggies can actually get sunburns. The unstable high heat and UV rays can damage their skins, just like we get sunburned. Plus we all know how windy it can get around here, you don’t want to come home to… empty screens! (also, birds and squirrels like seeds too, so don’t build them a buffet)
Tomato Time!
Ok, now you have 50 tomatoes that you’ve squished the guts out of… lets cook them up for use another day. Simply throw them all into a heavy bottomed soup pot. Crank the heat to boiling, then turn down and simmer for at least 1 hour. (at 2 hours they get nice & sweet). You do not need to add water or anything else. Just simmer the toms, let them cool to the touch, then hand “mash” them and freeze. You have just made a very natural “hand crushed’ tomato sauce – better than anything you could ever buy in a store.
I fill zip-lock bags, squeeze all the air out and create nice little “pillows” in my freezer. They will last at least 6 months. (at my house only about half that time, because they are so versatile).
Salt. Another mystery-myth that many people promote “You must add lots of salt, it acts as a preservative”. Well, in the case of freezing slow-simmered cooked tomatoes, I disagree completely. I have no use for salt, especially when cooking anything. I tend to rely on the wonderfully nutritious & natural flavors that the garden produces rather than adding sodium chloride.
Chef Frank’s October Harvest Faves
What do I add to tomatoes? … is what is being harvested September thru October: chili peppers of all kinds, sweet to stupid-hot. Lots of garlic & onions with a heavy hand of oregano. You simply cannot cook (or purchase) better than this: locally grown fresh vegetables, harvested at their peak of maturity. You’ll get the highest amounts of nutrition, flavor and textures… at the lowest prices of the year. Perfect!
This is my “go-to” blend for just about anything, from dollop into mom’s chicken soup to a deep rich spaghetti sauce or a big batch of chili…


